Texture, Transition and Energy: A residency with Colin Reid
Cara Wassenberg was the successful applicant for the Contemporary Glass Society’s Amanda Moriarty award in 2019. Her prize was a two-week residency with renowned kiln-cast glass expert, Colin Reid. Owing to the pandemic, Cara’s second week at the studio was delayed until October 2021. Here she tells the story of her residency experience, which she used to create three glass artworks on the themes of support or restriction.
It seems amazing that I have only just completed a residency that I applied for in February 2019 – two years and eight months on! But we live in extraordinary times.
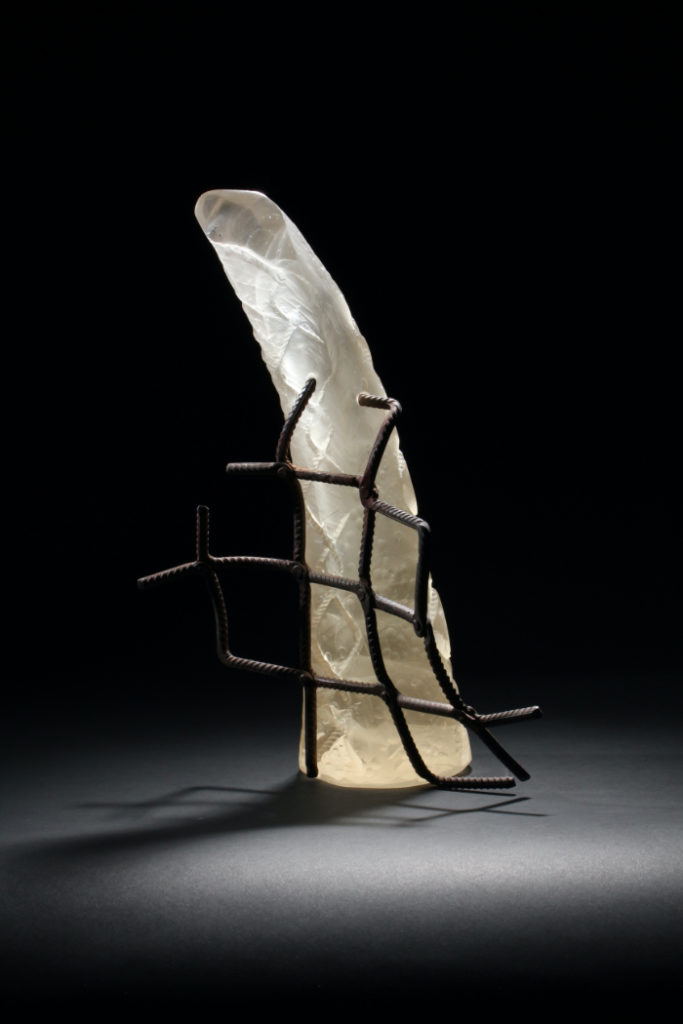
During my first week at Colin’s studio I had worked on developing three glass pieces that would be combined with steel rebar elements.
In the months between my first and second week of residency, I tweaked, sandblasted and finished the forged steel rebar grilles that I had used to impress texture into my clay originals. They were finished with a waxed Ferric Nitrate-produced patina. The idea was to fit these metal elements back into the grooves and channels of the cast borosilicate glass forms after cold working.
Day 1
Karen, Colin’s assistant, met me as Colin was away until the next day. It was great to see her and talk about glass again, recall our various lockdown experiences and ask many practical questions, such as: Can you cast glass a second time? What really is devitrification? How do you promote veiling? Is flashing a good thing?
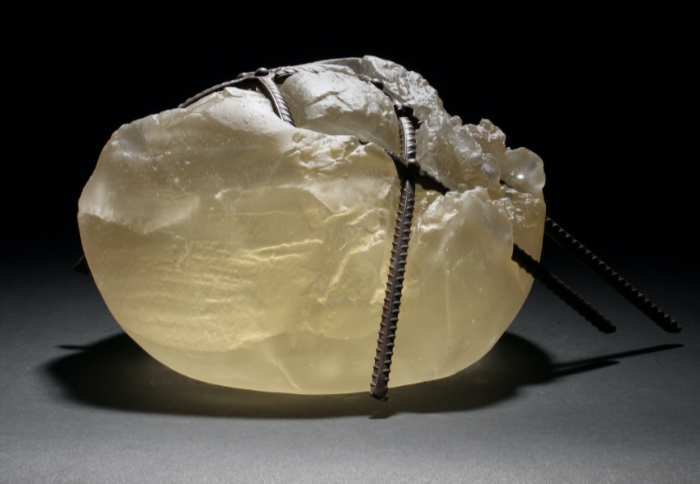
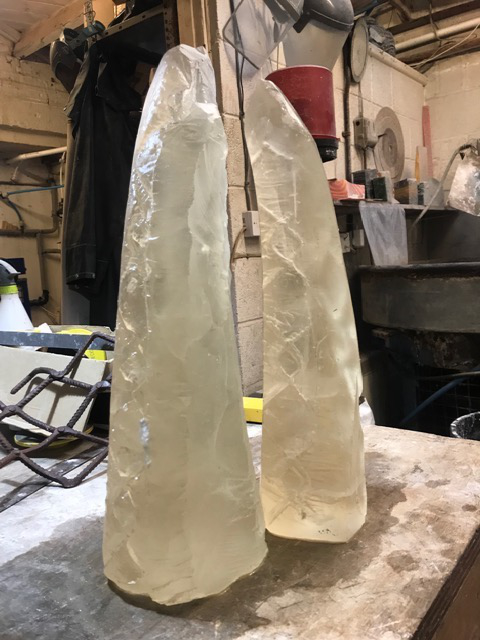
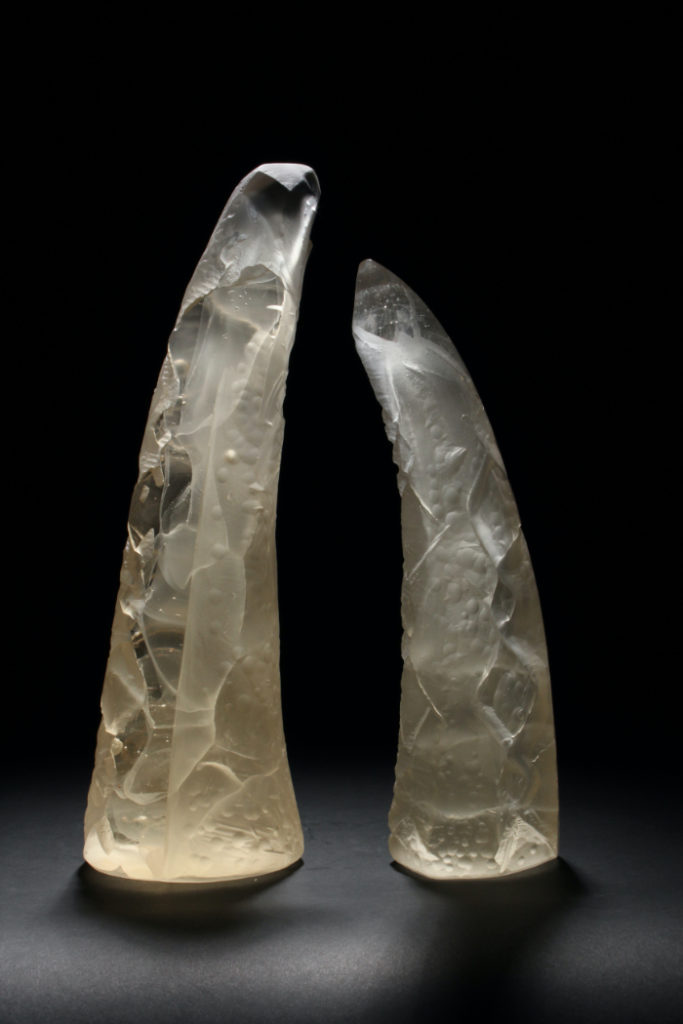
My three pieces consisted of two based on constricted tree forms (44cm and 36cm high), and one cast from a clod of stony earth (14 x 26 x 30cm) that I named Cotswold Clod (see main feature image). All had been impressed with my forged steel grilles.
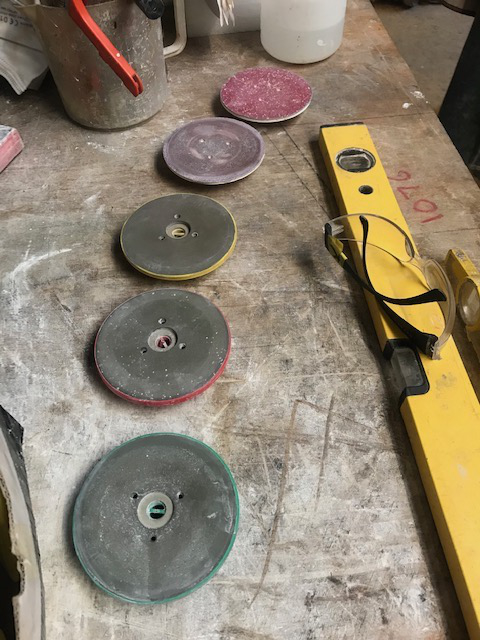
Before any fine-tuning could take place, a lot of basic forming was required. I had misjudged the amount of glass needed in the moulds using the water displacement method, so the surplus had to be cut off. Karen suggested this could be milled off but I wanted to use only equipment that I had in my own workshop. I have an air compressor, so air tools were ok. I removed the excess with an air grinder and cutting disc. I then started grinding back areas after crosshatching them with marker pen to ensure I didn’t miss one. I went against my own principles when I used the flatbed and Aluminium oxide to level the bases.
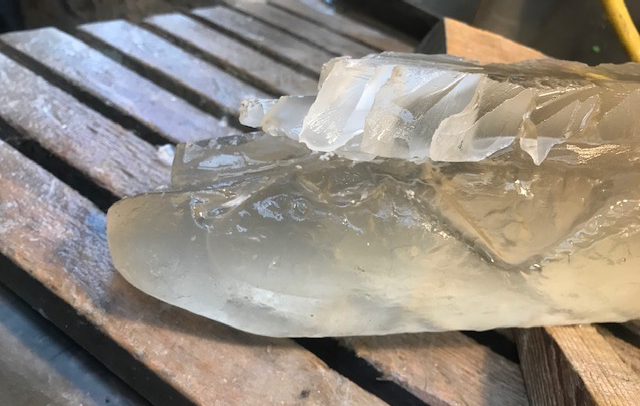
I then spent painful hours trying to decide how to make sense of the Tree forms. What is it about glass? It seems to have life of its own, despite the most careful initial mould making of the Gelflex forms and fitting of the steel forms back to the waxes. Shrinkage and distortion appeared to have taken place. An added challenge was the sheer length of time that had elapsed since my initial drawings, when I conceived the idea of split tree guards and saplings; momentum had been lost.
Having more or less given up hope of slotting the grilles back into the glass tree forms, I started sanding down the roughly chopped areas and then threw began boldly cutting away with the air grinder, deciding on the form and facets to be polished in a much more spontaneous way.
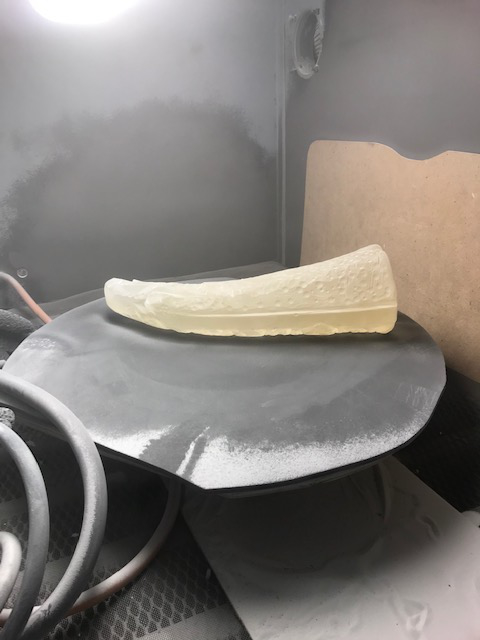
‘Cotswold Clod’ was a better fit with the steel grille and less cold working was needed. I cut away underneath so that the base was as small as possible, bringing more lightness and making it appear less lumpy and top-heavy. Karen suggested grinding and polishing the base to let more light in. This is not usually advised because the bottom of a piece is easily scratched, but it worked well in this context and it could be protected with small gel feet. I succumbed to the easy joy of the automatic, vibrating reciprolap and the next day returned to find my clod had a wonderfully smooth, shiny bottom.
Day 2
I continued to cut and work my tree forms, which were becoming more tusk-like. I felt like a stone or ice sculptor. I cold worked holes to push the grills in, but they still seemed like an add-on. I let the shape and texture of the pieces dictate the form to me. Embracing a more spontaneous approach felt good and the hours passed quickly as I imprinted more texture, using the domed head of the air die grinder and the electric foot-pedalled flexi drive for more precise areas.
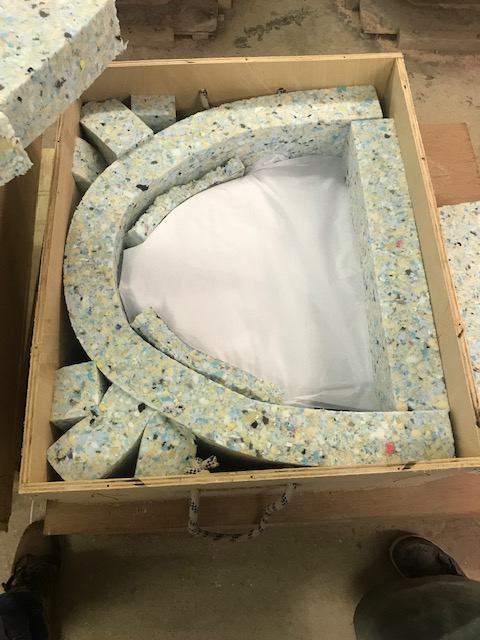
In the afternoon Karen was packing up a piece of Colin’s work to send to a gallery and she explained some of the best ways to construct a packing case. She used 10mm plywood with rope handles, arranging 10cm thick foam around the edges, which she glued to the box with a spray adhesive used for upholstery. Such practical chats were informative about how to run a studio.
Day 3
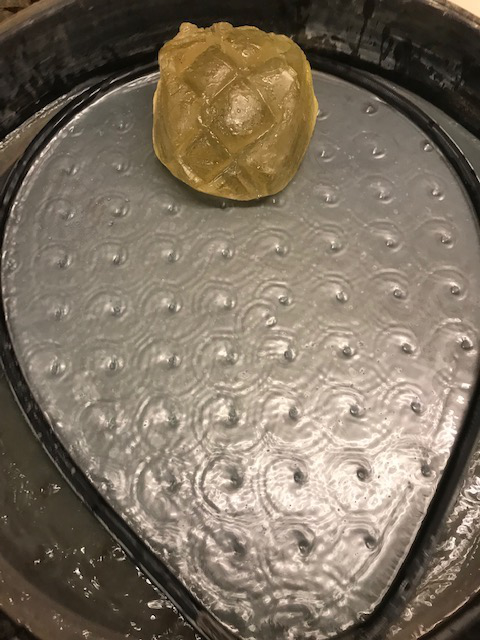
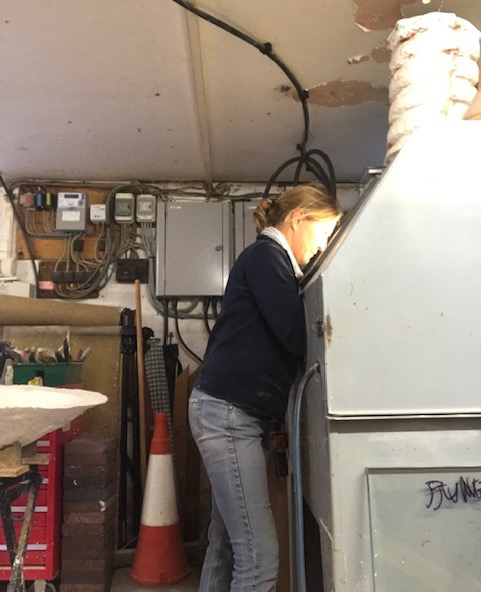
In the morning the sandblaster and I got to know each other. Colin has an American beast of a machine and it made light work of both the Cotswold clod and brought greater uniformity to the tree form pieces. The ground down areas merged with the textured parts and at last I could see them as homogenous pieces.
Colin gave me a ‘tutorial‘ about firing schedules, which was immensely helpful and gave me more confidence. I learnt a new word from Colin: ‘Crizzle’. This means something between crack and fizzle and is what happens when you plunge hot glass into cold water in a tin bucket to make frit.
Day 4
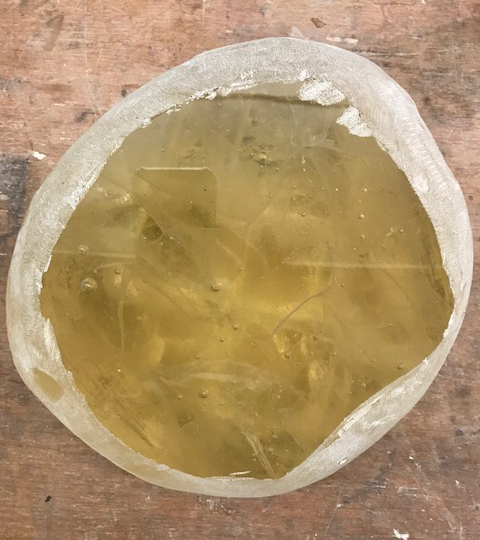
The polishing day dawned. I had pinpointed some areas of my tree forms where I wanted to let the light in and Colin showed me how to work my way up from a green Diasol pad to a brown smoothing pad on the pneumatic air polisher, to achieve a flawless, polished finish. This was learning by doing and there was something very meditative in this methodical process. Once I had carefully crosshatched and polished away the spines, I saw the power of a particular polished area in contrast with a sandblasted textured one. I loved being able to highlight a definite ridge and was seduced by the languid depths of veiling. I realised that, with relatively simple purchases, I could achieve the same results in my cowshed.
My pieces were nearly finished. I masked off the polished areas and gave all the pieces a final sandblasting and treated those matt areas with a protective liquid called Clear Shield.
Day 5
Colin takes all his own photos and gets great results. After so many years of experience he knows his subject, his equipment and audience well and he has found his formula. He backlights his polished glass against a black background and generally uses only one, and sometimes two, Bowen studio lights. I had brought my own Canon camera with me which wasn’t too dissimilar to his.
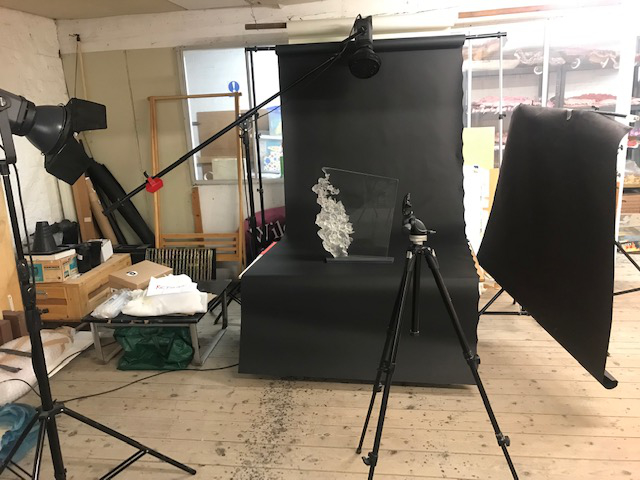
He helped me set up my pieces and I used his flash head to link his studio light operation to my camera. I spent the next couple of hours getting some shots, systematically adjusting the aperture to a range of exposures. The quality of the results was impressive, and I understood how to achieve similar results at home.
That afternoon I loaded up my van with three new pieces of work, but that was just the half of it. More importantly, I left armed with more techniques than I could have imagined. Despite the pandemic, both parts of this residency took place at exactly the right time for me in my life and work practice. I had had a good idea of what I needed to learn, but I had no idea that the whole experience would be so comprehensive and fulfilling.
I have notebooks full of information and new tools on order and I know that it will feed into my work and workshop practice. My mould-making process is already greatly improved and now I can start letting light in to my copper pieces through areas of cast class.
I want to say a huge and sincere ‘thank you’ to the board of the Contemporary Glass Society for giving me this opportunity, and of course to Karen Browning for all her knowledge and help. My final thanks must go to Colin himself for inviting me into his beautiful, creative studio and sharing his vast expertise, knowledge of technique and his time.
If you would like to read the blogs leading up to this second week of residency, please follow this link to my website https://carawassenberg.com/news/.
About the artist
Cara Wassenberg studied Fine Art in Coventry in 1986 and went on to specialise in metalwork and design at Hereford Technical College. She has worked with artists and metalsmiths in London, Lisbon, Memphis and Berlin.
In 2012 she worked with the French copper smith Christoph Desvallees in Normandy.
In 2017 she completed a Masters degree in Metal Work and Glass at the University of the Creative Arts, Farnham. Following this, she began incorporating cast glass into her work.
She teaches metals-based short courses at West Dean College of Arts and Conservation alongside her own studio practice.
Find out more via her website.
Main feature image: ‘Cotswold Clod’ cast glass and steel rebar. Photo: Cara Wassenberg.
Related Articles
14-03-2024
Political influence: an interview with David Reekie
08-02-2024